Introduction
Proper installation of defensive barriers is critical for military base protection, perimeter security, and battlefield fortification. Whether you are deploying anti-tank barrier nets, MZP Putanka wire obstacles, or concertina wire barriers, following a structured defensive barrier installation guide ensures maximum effectiveness and crew safety. This comprehensive guide covers site preparation, step-by-step installation procedures for three major barrier types, essential tools, common mistakes, and time estimates — everything you need to deploy field-ready defensive barriers.
Military and security personnel face unique challenges when installing anti-tank barriers in field conditions. Factors such as terrain type, soil composition, weather, available manpower, and equipment access all influence the approach. This defensive barrier installation guide consolidates best practices from experienced military engineers and field operators, providing actionable procedures that work across diverse operational environments.
We cover three primary barrier categories: anti-tank barrier nets (including tank barrier nets and tank obstacle barrier nets), MZP Putanka anti-tank wire mesh (low-visibility wire obstacles), and concertina razor wire barriers. Each has distinct installation requirements, tools, and safety considerations. By the end of this guide, you will know exactly how to install each type, what tools you need, how long the process takes, and how to avoid costly installation errors.
Site Assessment and Ground Preparation for Anti-Tank Barrier Installation
Before any barrier installation begins, thorough site assessment and ground preparation are essential. How to prepare the ground before installing an anti tank barrier is one of the most frequently asked questions by field operators. The answer starts with evaluating the terrain where the barrier will be deployed.
Site Evaluation Checklist
- Terrain type: Identify whether the ground is soft soil, hard-packed earth, sand, gravel, or rocky. Each type requires different anchoring methods. For a barbed wire barrier installation for military base, the ground must accommodate both barbed wire and concertina fence posts.
- Drainage patterns: Avoid low-lying areas where water accumulation could undermine anchor stakes or cause barrier shifting.
- Vehicle approach routes: Position barriers perpendicular to expected tank or vehicle approach paths for maximum stopping power. The anti tank obstacle netting system must be aligned to intercept approaching vehicles at their most vulnerable angle.
- Concealment requirements: For low-visibility obstacles like MZP Putanka wire barriers, select terrain with natural vegetation that helps camouflage the installation.
- Subsurface hazards: Check for buried utilities, rocks, or debris that could interfere with stake driving or anchoring.
Ground Preparation Steps
- Clear the installation zone: Remove large rocks, vegetation, and debris from the deployment area. For concertina wire installations along fences, trim back overhanging branches or climbing vines.
- Level the surface: Fill major depressions and remove mounds that could prevent the barrier from lying flat against the ground. Anti-tank barrier nets need full ground contact to stop tracked vehicles effectively.
- Mark anchor points: Stake out corner positions and intermediate anchor locations before unrolling any barrier material. Use marking flags or spray paint for precision.
- Test soil compaction: Drive a test stake into the ground at each anchor location. If the stake meets hard resistance within 30 cm, the soil is suitable. If it sinks too easily, you will need longer stakes or alternative anchoring methods.
- Stage materials: Position barrier rolls, stakes, tools, and connectors along the marked line to minimize carrying distance during active installation.
What safety precautions should be taken during anti tank barrier installation? Always wear cut-resistant gloves when handling wire mesh products. For concertina wire installation, additional arm and leg protection is mandatory. Ensure at least two personnel are present during heavy lifting of barrier net rolls, which can weigh 25-50 kg depending on size. Establish a safety zone around the installation area and maintain communication between team members.
Anti-Tank Barrier Net Installation: Step-by-Step Field Deployment
Anti-tank barrier nets (also called tank barrier nets or tank obstacle barrier nets) are heavy-duty wire mesh barriers designed to stop or slow armored vehicles by entangling their tracks and undercarriage. Installing these nets correctly in field conditions requires a systematic approach. This tank trap netting installation guide covers the complete step-by-step procedure for field deployment.
How is anti tank barrier net installed? The process involves three main phases: unrolling and positioning, anchoring and securing, and connecting multiple sections for extended coverage. How to install an anti tank barrier in the field follows these same general principles regardless of the specific net product.
For military base perimeter protection, advanced anti tank mesh for military base perimeter installations follow a reinforced procedure with additional anchoring requirements. These instructions apply to standard anti-tank barrier nets used for base defense, perimeter security, and tactical field deployment. For MZP Putanka anti-tank wire mesh, a different rapid-deployment method is used (covered in the next section).
Unrolling and Positioning the Barrier Net
Begin by positioning the barrier net roll at one end of the marked installation line. How to install anti tank mesh protective net for perimeter security starts with orienting the roll so it unrolls in the direction of vehicle approach.
- Cut binding straps: Most tank barrier nets arrive tightly rolled and secured with plastic or metal straps. Cut these carefully to avoid damaging the mesh.
- Unroll along the marked line: Two personnel should walk the roll forward while a third guides the mesh to prevent twisting or folding. For 10 m x 10 m nets, allow approximately 5-8 minutes for unrolling with a three-person team.
- Check for twists: Inspect the full length of the deployed net for any twisted sections. Twisted mesh creates gaps that vehicles can exploit. Flatten and straighten as needed.
- Position edge alignment: The net should extend 1-2 meters beyond the expected vehicle approach path on each side. This prevents armored vehicles from simply driving around the barrier.
- For multiple sections: Leave 0.5-1 meter overlap between adjacent net sections before anchoring. This overlap area will be used for connecting sections together.
How to install anti tank obstacle netting in field conditions may require adjustments for wind. In windy conditions, place sandbags or heavy objects on the leading edge of the net before fully unrolling to prevent the mesh from catching wind and becoming unmanageable.
Anchoring and Securing the Anti-Tank Net
Proper anchoring is the most critical step for anti-tank barrier net installation. A poorly anchored net will simply be pushed aside by an advancing vehicle. This tank trap netting installation guide emphasizes anchoring as the single most important factor in barrier effectiveness. Use the following method for reliable field anchoring.
- Corner anchors first: Drive the first anchor stake at a 45-degree angle through the nets reinforced corner grommet or edge loop. The stake should angle away from the expected vehicle approach direction to resist pulling forces.
- Stake specifications: Use steel T-stakes or J-stakes at least 60 cm long for standard soil. In sandy or loose soil, use 90 cm stakes or screw-in ground anchors. Space corner anchors no more than 1 meter from each net corner.
- Edge anchoring: Install intermediate stakes every 2-3 meters along the nets long edges. Each stake should pass through the mesh near the edge, not through the open center. For tank barrier net installations on hard surfaces where stakes cannot penetrate, use 20 kg sandbags or concrete blocks at 1.5-meter intervals.
- Bottom edge tension: The bottom edge of the anti-tank barrier net must lie flat against the ground. Use ground staples or U-pins to secure the bottom edge every 1-2 meters. This prevents vehicles from getting under the net.
- Double-anchor high-stress points: At corners and connection points between net sections, install two stakes instead of one for redundancy. These points experience the highest load when a vehicle impacts the barrier.
How to install professional tank barrier nets for military perimeter defense often requires anchoring into frozen ground. In these conditions, pre-drill pilot holes with a gas-powered auger or use rock-climbing style expansion anchors designed for permafrost.
Connecting Multiple Barrier Net Sections
When installing barriers longer than a single net panel, you must connect multiple sections to create a continuous defensive line. How to install tank barrier wire mesh for perimeter defense across large areas typically requires joining 2-4 net sections. A complete anti tank obstacle netting system connects multiple panels into an unbroken defensive barrier with no weak points.
- Overlap method: Overlap adjacent net sections by 30-50 cm. This is the simplest method and provides good continuity. Use tie wire or zip ties at 30 cm intervals along the overlapped area to join the two mesh panels.
- Lacing technique: For stronger connections, use steel tie wire to lace the edges together in a mattress-stitch pattern. Thread the wire through matching mesh openings on both sections, pull tight, and twist to secure. This creates a connection nearly as strong as the net itself.
- Shared anchor stakes: Where two sections meet, install a single heavy-duty stake that passes through both sections edges simultaneously. This creates a unified anchor point that prevents separation under load.
- Connector plates: Some anti-tank barrier net systems include purpose-built metal connector plates. These sandwich the overlapping mesh edges and bolt together for a clean, high-strength joint. Follow the manufacturers torque specifications for bolts.
- Reinforce connection points: Add diagonal bracing stakes at each connection point to handle lateral loads during vehicle impact. A vehicle hitting the barrier at an angle can generate significant sideways force at section joints. A barbed wire barrier installation for military base often combines these connected net sections with concertina wire and barbed wire for layered perimeter defense.
Once all sections are connected and anchored, walk the entire length to check for loose mesh, exposed anchor heads, or gaps that could compromise the barrier. How to install an anti-tank barrier for base defense should always conclude with a full perimeter walkthrough inspection.
MZP Putanka Installation: Rapid Deployment for Single Operators
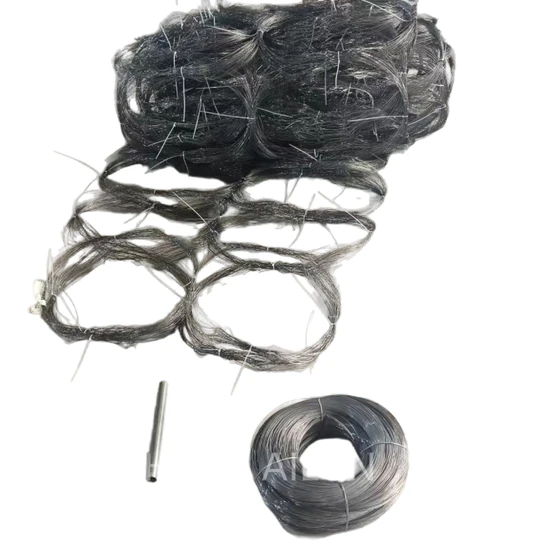
MZP Putanka is a specialized anti-tank wire mesh barrier designed for rapid single-operator deployment. Unlike traditional heavy anti-tank barrier nets, Putanka is lightweight, compact, and can be installed by one person in under 10 minutes. This PUTANKA Anti-Tank Steel Wire Mesh Barrier Installation Guide covers the specific deployment methods that make Putanka unique.
How to install MZP Putanka wire barrier in the field differs significantly from standard net installation because Putanka uses a unique low-visibility design with pre-attached anchoring systems. Understanding these differences is essential for effective deployment.
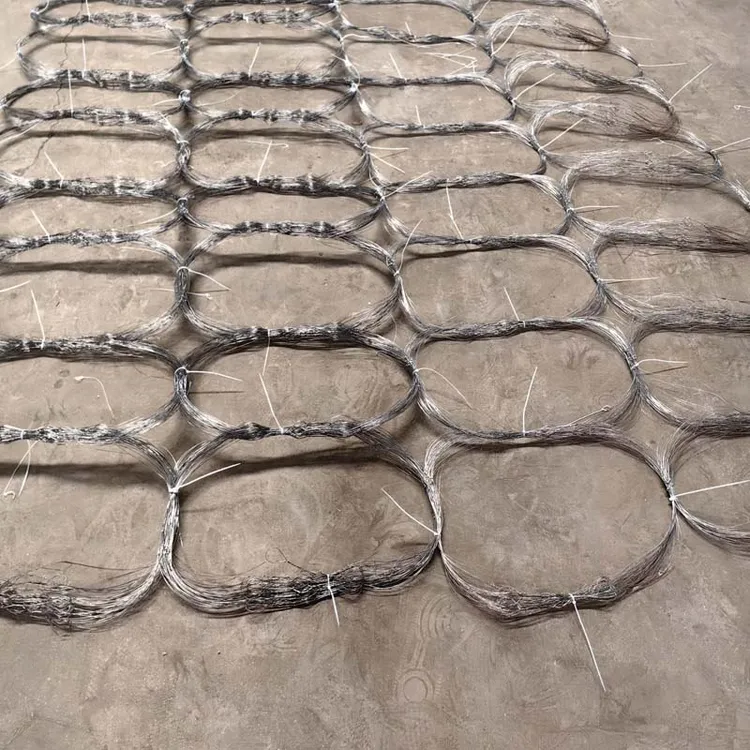
The MZP Putanka barrier (also called a 10 m x 10 m low visibility wire obstacle) consists of fine steel wire mesh that is difficult to detect visually and from drones — a critical advantage for modern battlefield conditions where aerial surveillance is constant.
How is anti tank net installed on the battlefield? For Putanka specifically, the process prioritizes speed and concealment over the brute-force anchoring used with heavier nets.
Terrain Selection for Putanka Wire Barrier Deployment
Proper terrain selection dramatically impacts MZP Putanka wire barrier effectiveness. Unlike concertina wire or heavier anti-tank nets that rely on visible deterrence, Putanka works best when it is difficult to detect.
- Vegetated areas: Select ground with natural grass or low shrubs 20-50 cm tall. The vegetation helps camouflage the fine wire mesh while still allowing the barrier to function. Avoid areas with thick brush that could lift the mesh off the ground.
- Approach corridors: Identify natural vehicle approach routes — these are usually open terrain between treelines, along valley floors, or crossing dry stream beds. Installing Putanka anti-tank wire mesh across these corridors maximizes interception probability.
- Hard ground preferred: MZP Putanka uses lightweight stakes that work best in firm soil. Rocky terrain makes stake driving difficult; sandy soil may require additional anchoring. Avoid areas where the ground is too soft to hold the pre-attached stakes.
- Concealed access: Ensure the installation team can approach the site without being observed. Since Putanka is a low visibility wire obstacle, the element of surprise is key — enemies who see the installation can simply bypass or target it.
- Drainage considerations: Avoid dry creek beds or drainage channels that could flood during rain. Running water can wash away lightweight Putanka anchors and compromise the installation.
How to install a 10m x 10m low visibility wire obstacle — the most common Putanka configuration — requires a cleared area slightly larger than the net dimensions. Mark the four corners before beginning deployment to ensure proper positioning.
Unpacking and Spreading the MZP Putanka Wire Obstacle
The rapid deployment capability of MZP Putanka is one of its greatest advantages. How to install Putanka anti-tank wire mesh in the field follows this efficient procedure:
- Open the deployment bag: Putanka typically ships in a compact carry bag. Open it at the designated corner of the installation area and remove the folded wire mesh.
- Locate the corner anchors: Putanka has pre-attached anchor stakes at each corner, integrated into the mesh during manufacturing. Locate all four corner stakes before beginning to unfold.
- Walk out the first edge: Grasp one corner stake and walk toward the next corner marker, allowing the mesh to unfold behind you. Unlike heavy anti-tank nets that require rolling, Putanka unfolds easily due to its lighter wire gauge.
- Deploy opposite corner: Walk the second corner stake to its position, continuing to unfold the mesh. The entire 10 m x 10 m net should deploy in 2-3 minutes with a single operator.
- Spread remaining mesh: Shake out any folds or bunching. The fine wire mesh should lie flat against the ground. Walk the perimeter to ensure full coverage.
- Drive corner stakes: Using a mallet or boot heel, drive each corner stake into the ground at a 45-degree angle away from the expected vehicle approach direction. Putanka stakes are designed for quick insertion without specialized tools.
- Deploy intermediate anchors: Putanka includes intermediate anchor points along its edges. Drive these into the ground at 1-2 meter intervals to maintain tension across the barrier.
The total installation time for a single-operator MZP Putanka wire obstacle deployment is 5-10 minutes, making it one of the fastest deployable anti-tank barriers available.
Securing Putanka Anti-Tank Mesh in Position
After deployment, securing the MZP Putanka barrier properly ensures it remains effective until deliberately retrieved. How to install MZP Putanka wire barrier in the field for extended duration requires additional steps beyond the initial deployment. This PUTANKA Anti-Tank Steel Wire Mesh Barrier Installation Guide recommends the following security measures for field installations.
- Check perimeter tension: Walk the entire barrier perimeter and verify that the mesh lies flat. Lift any raised sections and re-stake as needed. Even a 10 cm gap beneath the mesh can allow a tank track to gain purchase.
- Camoflage the mesh: Lightly sprinkle loose soil, leaf litter, or cut vegetation over the installed Putanka mesh. The goal is to break up the wires outline, not to completely bury it. Fine steel wire already has a low visual signature — natural debris enhances this.
- Alternate stake orientation: Corner stakes angle away from vehicle approach. Edge stakes should alternate angles — one angled left, the next right — to resist pulls from multiple directions.
- Secondary anchors: In soft soil, supplement the Putanka stakes with additional tent-style stakes or sandbags at corner positions. This prevents the entire barrier from being dragged loose if a vehicle impacts one edge.
- Mark for friendly forces: While Putanka is designed to be low-visibility to enemies, friendly forces must know its location. Record GPS coordinates and mark the barrier on unit defense diagrams. Consider a subtle marking system visible only from friendly approach directions.
How are anti-tank barriers installed in military bases that use Putanka? Military base installations typically deploy Putanka along perimeter fence lines and in gaps between heavier concrete barriers, using the rapid-deployment method described above supplemented with permanent anchor points for semi-permanent positions.
Concertina Wire Barrier Installation Guide
Concertina wire barriers are among the most widely used perimeter security and anti-personnel obstacles. How to install razor concertina wire barrier step by step is a common search query because proper installation directly affects barrier effectiveness and safety. This section provides razor concertina wire barriers installation steps and tips for field operators at all experience levels.
Concertina wire, also called razor wire or razor concertina wire, consists of coiled wire with sharp blades that create a formidable barrier. Concertina wire barriers can be installed on existing fences, walls, or as standalone ground barriers. This section covers all common installation scenarios with emphasis on concertina wire installation step by step procedures.
How to install concertina wire barriers step by step depends on the mounting surface and configuration. We cover the three most common setups: fence-top mounting, wall-top mounting, and ground deployment.
Bracket Selection and Fence Mounting for Concertina Wire
Proper bracket selection is essential for concertina wire fence installation. How to install concertina wire barriers with brackets on a fence requires understanding bracket types and spacing requirements. For detailed razor concertina wire barriers installation steps and tips, pay close attention to bracket selection as it directly impacts barrier stability and longevity.
Bracket Types
| Bracket Type | Best For | Spacing | Max Coils |
|---|---|---|---|
| V-bracket (single arm) | Fence top installation | 2-3 meters | 1-2 coils |
| Y-bracket (double arm) | Wall top installation | 3-4 meters | 2-3 coils |
| Gooseneck bracket | Chain link fence topping | 2-3 meters | 1-2 coils |
| Wall bracket (L-shaped) | Concrete wall mounting | 3-4 meters | 2-4 coils |
| Ground spike bracket | Ground deployment | 1-2 meters | 1 coil |
Installation Steps
- Mount brackets at correct height: For fence topping, brackets should extend 30-45 cm above the existing fence top. For wall mounting, position brackets 15-30 cm below the wall top edge. Mark all bracket positions before drilling or attaching.
- Use corrosion-resistant hardware: All bracket bolts, screws, and mounting plates must be galvanized or stainless steel. Standard hardware rusts within months in outdoor conditions, compromising the barrier.
- Secure each bracket with two fasteners: A single bolt per bracket creates a pivot point. Use two bolts or screws per bracket to prevent rotation under load or wind vibration.
- Maintain consistent spacing: Bracket spacing should not exceed 3 meters for standard concertina wire installations. Wider spacing allows the wire to sag between supports, creating climbable gaps.
- Test bracket stability: Before installing concertina coils, apply firm downward and sideways pressure to each bracket. Any bracket that moves more than 5 mm needs additional fastening.
What brackets are needed for concertina wire fence installation? For most chain link fence installations, V-brackets or gooseneck brackets are the standard choice. Y-brackets provide additional stability for high-security installations where multiple stacked coils are used.
Concertina Wire Tensioning and Alignment
Once brackets are installed, the next step in concertina wire barrier installation is mounting and tensioning the concertina coils. How to install concertina wire barriers step by step requires attention to coil orientation and tension.
- Position the coil: Lift the concertina coil onto the installed brackets. Each coil has a natural expansion direction — position it so the wire spirals outward from the protected area.
- Secure the first end: Use tie wire (14-gauge galvanized steel) to secure the starting end of the coil to the first bracket. Make 3-4 tight wraps around both the bracket arm and the coil wire.
- Expand the coil: Walk along the fence line, gently pulling the coil to its full extension. Concertina wire is typically expanded to 60-80% of its original compressed length. A 15-meter compressed coil usually expands to 8-12 meters when properly tensioned.
- Attach to intermediate brackets: Use tie wire at every bracket along the installation line. Two wraps per bracket connection point provide adequate security. Do not over-tighten the tie wire — the coil needs slight freedom to move in wind without concentrating stress.
- Secure the far end: Once the coil is fully positioned, secure the trailing end to the last bracket using the same tie-wire method. Trim excess tie wire ends and bend them flat against the bracket to prevent snagging.
- Tension adjustment: Walk the entire installed length and check for consistent tension. The coil should not sag more than 10 cm between any two brackets. If sag exists, add intermediate brackets or adjust tie-wire positions.
Multiple Coil Stacking
For high-security installations, multiple concertina wire coils are stacked on the same brackets. When stacking:
- Install the bottom coil first, then add upper coils offset by half a coil diameter for maximum coverage.
- Each additional coil adds 5-8 minutes to installation time per 10 meters of fence line.
- Use longer brackets (Y-type) designed for multi-coil support — standard V-brackets cannot safely support more than two coils.
What are the best methods for installing concertina wire barriers? Military best practices recommend installing coils during cooler morning hours when the wire is less stiff and easier to handle. In cold weather, store coils at room temperature before installation to improve flexibility.
Safety Precautions for Concertina Wire Handling
What safety precautions for concertina wire installation? Concertina wire is extremely sharp and can cause severe injuries. Following proper safety protocols is non-negotiable for any concertina wire barrier installation.
Personal Protective Equipment (PPE)
- Cut-resistant gloves: Minimum ANSI Cut Level 5 gloves are required. Standard work gloves provide inadequate protection against concertina wire blades.
- Arm sleeves: Wear heavy-duty canvas or Kevlar arm sleeves extending from wrist to elbow. Concertina wire handlers frequently sustain forearm lacerations.
- Eye protection: Safety glasses or goggles are mandatory. Wire tensioning can cause blade fragments to snap and fly at high speed.
- Steel-toe boots: Concertina coils are heavy (15-25 kg per 15 m coil) and can crush feet if dropped. Steel-toe boots prevent foot injuries during handling and installation.
- Thick trousers: Heavy-duty canvas or denim trousers protect legs when kneeling or crouching near installed wire.
Safety Procedures
- Two-person coil handling: Never handle concertina coils alone. One person guides the coil while the other manages the unwinding end. This prevents uncontrolled uncoiling that can cause whip-lash injuries.
- Maintain clear work zone: Keep non-essential personnel at least 5 meters from active concertina wire installation. The work zone should be clearly marked with safety tape or barriers.
- Watch for spring-back: Concertina wire under tension can spring back violently if a tie wire breaks or a bracket fails. Never stand directly in line with a tensioned coil.
- Tool discipline: Keep cutting tools, pliers, and tie wire organized in a tool belt — not loose on the ground. Dropped tools near concertina wire are difficult to retrieve safely.
- First aid readiness: Keep a trauma kit with tourniquets and sterile bandages at every installation site. Concertina wire cuts can be deep and bleed profusely. Know the location of the nearest medical facility.
- Post-installation inspection: After installation, carefully inspect the entire barrier for loose wire ends that protrude into walkways or vehicle paths. Trim and cap all exposed wire ends.
What safety precautions should be taken during anti tank barrier installation? For heavy anti-tank nets, additional precautions include proper lifting technique (bend at knees, not waist), wearing back support belts when lifting net rolls over 25 kg, and ensuring all team members maintain clear communication during deployment operations.
Essential Tools for Defensive Barrier Installation Guide
What tools are needed for concertina wire installation? What tools are needed to install an anti tank barrier? These are two of the most common questions from field operators. The tool requirements vary by barrier type, but a core set of tools applies across all defensive barrier installation scenarios. For advanced anti tank mesh for military base perimeter installations, you may need additional heavy-duty anchoring equipment beyond the standard tool set.
Universal Tools (All Barrier Types)
| Tool | Purpose | Recommended Spec |
|---|---|---|
| Sledgehammer (4-6 kg) | Driving anchor stakes | Fiberglass handle, 4 kg head |
| Post driver | Driving T-stakes | Sliding weight type, 5-7 kg |
| Wire cutters | Cutting tie wire, mesh | Heavy-duty compound leverage |
| Pliers (linemans) | Twisting tie wire, bending | 200 mm insulated handle |
| Tape measure (30 m) | Measuring spacing, alignment | Fiberglass, lockable |
| Safety gloves | Hand protection | ANSI Cut Level 5 minimum |
| Marking flags | Marking anchor positions | Bright color, 50 cm staff |
| Tool belt | Carrying tools during install | Heavy-duty canvas or nylon |
Anti-Tank Barrier Net Tools
- T-stakes or J-stakes: 60-90 cm steel ground stakes for anchoring. Quantity: 1 per linear meter of barrier.
- Ground staples/U-pins: 30 cm galvanized steel for bottom edge securing. Quantity: 1 per 1.5 meters.
- Sandbags (optional): For hard-surface installations where stakes cannot penetrate. 20 kg bags. Quantity: 1 per meter.
- Net connector plates: For joining multiple net sections (if not using overlap method). 2 per connection point.
- Zip ties (heavy-duty): 400 mm length, 8 mm width, UV-resistant. For mesh overlap connections.
MZP Putanka Tools
- Rubber mallet (2 kg): For driving Putankas lightweight stakes (a sledgehammer may damage them).
- Scissors or utility knife: For opening deployment bags and cutting any packing straps.
- Optional: GPS unit: For recording barrier coordinates in unit defense plans.
Concertina Wire Tools
- Concertina coil carriers: Purpose-built handles for carrying and positioning coils. Reduces injury risk significantly.
- Tie wire (14-gauge galvanized): For securing coils to brackets. Quantity: approximately 30 meters per 100 meters of concertina barrier.
- Bracket installation hardware: Bolts, anchors, and mounting plates appropriate for the mounting surface (concrete anchors for walls, fence clips for chain link).
- Wire tensioner tool: For adjusting coil tension during installation (optional but recommended for large installations).
What tools are required for installing concertina wire barriers? At minimum, you need cut-resistant gloves, wire cutters, pliers, a tape measure, and a ladder (for fence-top installations). For large-scale defensive barrier installations, a power auger for pilot holes can reduce installation time by 50%.
Common Installation Mistakes and Troubleshooting
Even experienced teams make installation errors. Recognizing and avoiding these common mistakes improves barrier effectiveness and reduces rework. What are the best methods for installing concertina wire barriers? Part of the answer is knowing what not to do.
Anti-Tank Barrier Net Mistakes
- Insufficient anchoring: The most common error — using too few stakes or stakes that are too short. A 10 m x 10 m tank barrier net needs at least 20 anchor points minimum. Cutting corners here guarantees barrier failure under vehicle impact.
- Gaps beneath the net: Failing to secure the bottom edge allows vehicles to drive under the barrier. The net must contact the ground across its entire surface. Use U-pins every 1 meter along the bottom edge.
- Twisted mesh: Not checking for twists during deployment creates weak points where the mesh can separate under load. Always inspect before final anchoring.
- Wrong stake angle: Stakes driven straight down provide minimal resistance to horizontal pulling forces. Always drive stakes at a 45-degree angle opposing the expected vehicle approach.
MZP Putanka Mistakes
- Over-tensioning: Putanka is designed for low tension. Pulling it too tight creates gaps at the edges and reduces the low-visibility advantage.
- Poor camouflage: Leaving bright deployment bag materials or packaging near the installed barrier compromises concealment. Pack out all packaging waste.
- Wrong terrain choice: Installing Putanka on open, exposed ground where it offers no concealment benefit. Use Putanka where natural cover exists.
Concertina Wire Mistakes
- Inadequate PPE: The most dangerous mistake — working with concertina wire without proper cut protection. Concertina blade wounds are serious and require immediate medical attention.
- Uneven coil expansion: Expanding some sections more than others creates weak and strong zones. Attackers will exploit loosely expanded sections. Use consistent expansion ratio across the entire barrier.
- Incorrect bracket spacing: Spacing brackets too far apart causes sagging, which creates climbable areas. Never exceed 3-meter spacing for standard installations.
- Using incompatible hardware: Mixing galvanized and stainless steel fasteners causes galvanic corrosion that weakens connections over time. Use matching metal types.
- Ignoring wind loading: Concertina wire on tall fence installations experiences significant wind forces. Loose tie wires allow the coil to vibrate and fatigue-fracture at attachment points over weeks of exposure.
What are the step-by-step instructions for installing anti tank wire mesh barriers? The key is preparation — measure twice, stake once. Use a written checklist for each installation to ensure no steps are missed, especially for large-scale perimeter defense projects where consistency across sections is critical.
Installation Time Estimates for Different Barrier Types
How long does it take to install concertina wire barriers? How long does it take to install an anti tank barrier in the field? Installation time depends on the barrier type, team size, ground conditions, and the length of the barrier line. The following estimates are based on standard field conditions with a trained crew.
Installation Time Comparison Table
| Barrier Type | Team Size | Time per 10 m | Time per 100 m | Notes |
|---|---|---|---|---|
| Anti-tank barrier net | 3 persons | 15-25 min | 2.5-4 hours | Includes anchoring and tensioning |
| MZP Putanka (single operator) | 1 person | 5-10 min | 50-90 min | Rapid deployment, minimal tools |
| Concertina wire on fence | 2 persons | 20-30 min | 3-5 hours | Includes bracket mounting |
| Concertina wire on wall | 2 persons | 25-40 min | 4-6 hours | Requires drilling anchors |
| Concertina wire ground barrier | 2 persons | 10-15 min | 1.5-2.5 hours | Ground spikes, no fence prep |
| HESCO barrier | 4 persons | 30-45 min | 5-8 hours | Includes filling with local soil |
Factors Affecting Installation Speed
- Ground condition: Rocky or frozen ground doubles stake-driving time compared to normal soil. Pre-drilling pilot holes adds 5-10 minutes per 10 meters but may be necessary.
- Weather: High wind (>30 km/h) slows concertina wire handling significantly and can make anti-tank net deployment dangerous. Rain creates slippery conditions that slow all operations by 20-30%.
- Day vs. night: Night installation using night vision goggles or artificial light adds 40-60% to installation time. However, night installation may be required for tactical concealment.
- Experience level: A first-time installation team will take 2-3 times longer than the estimates above. With practice, times approach the standard estimates.
- Lighting conditions: Dawn/dusk low-light conditions increase installation time by approximately 25% due to reduced visibility for alignment and fine work.
Plan for the longest estimated time when scheduling field operations. Having extra personnel available reduces fatigue and allows rotation during extended multi-day installation projects covering 500+ meters of defensive barrier.
Conclusion: Defensive Barrier Installation Guide Best Practices
Successfully deploying defensive barriers in field conditions requires preparation, the right tools, and a clear understanding of each barrier types installation procedures. This defensive barrier installation guide has covered the essential steps for anti-tank barrier nets, MZP Putanka wire obstacles, and concertina wire barriers — the three most common categories of rapid-deployable defensive barriers.
Key Takeaways
- Site preparation is the foundation of any successful barrier installation. Proper ground assessment, clearing, and marking directly impact installation speed and barrier effectiveness.
- Anti-tank barrier nets require a three-person team, systematic unrolling, and thorough anchoring with angled stakes and bottom-edge securing. Never compromise on anchor point density.
- MZP Putanka offers the fastest deployment at 5-10 minutes per section by a single operator. Its low-visibility design makes it ideal for tactical situations where concealment matters.
- Concertina wire barriers demand the highest safety standards — proper PPE, bracket selection, consistent coil expansion, and secure attachment are all critical for both effectiveness and installer safety.
- Tools and equipment should be assembled and inspected before deployment begins. Missing tools during installation can delay operations and compromise quality.
- Common mistakes are predictable and preventable. Using a written installation checklist significantly reduces error rates, especially under time pressure.
How to install anti tank wire mesh on military bases follows the principles outlined here, with additional considerations for base-specific requirements such as integrated sensor systems, gate access points, and coordination with existing perimeter security infrastructure.
For specific product installation manuals, technical specifications, and detailed diagrams, consult the manufacturer documentation for your particular barrier system. This guide provides the general field procedures applicable across most anti-tank barrier netting and concertina wire products.
Always prioritize safety, verify every anchor point, and conduct a full walkthrough inspection after installation. Properly installed defensive barriers save lives and protect critical infrastructure.
![Anti-Tank Barriers Buyer's Guide: Types, Costs & Military Procurement [2026]](/images/anti-tank-barriers-hero.webp)